It is 2:15 on a Tuesday afternoon. A coworker stands up from their desk, takes a half step toward the door, and collapses. No warning. No symptoms anyone noticed.
In that moment, nobody in the room is thinking about quarterly reports or meeting agendas. There is only one question: does anyone here know what to do?
That question is the dividing line between a tragedy and a save. Sudden cardiac arrest kills approximately 350,000 Americans every year, and the vast majority of those deaths happen outside of a hospital: in offices, schools, gyms, parking lots, and homes.
Bystander intervention can double or triple a person’s chance of survival, yet fewer than half of cardiac arrest victims receive help from the people standing right next to them.
The reason is rarely indifference. It is almost always hesitation. People freeze because they have never been shown what to do, or because the last time they thought about CPR was a vague memory from years ago.
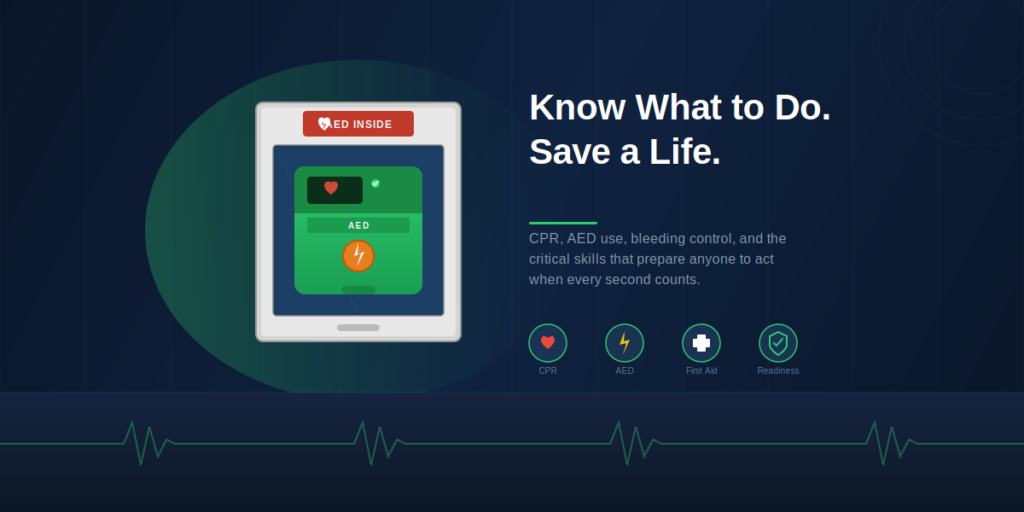
This guide exists to close that gap. It covers the essential life-saving skills, from CPR and AED use to bleeding control, choking relief, stroke recognition, and beyond, that prepare any person, not just medical professionals, to act decisively when every second counts.
Why Every Second Counts in an Emergency
Emergency medicine operates on a principle called the chain of survival: early recognition, early 911 activation, early CPR, early defibrillation, and early advanced care. Each link depends on the one before it, and the first three links belong to bystanders, not paramedics.
For every minute that passes without CPR or defibrillation during cardiac arrest, the chance of survival drops by roughly ten percent. By the time an ambulance arrives, the national average response time is eight to twelve minutes, irreversible brain damage may already be underway.
Bystander hesitation is the biggest barrier. Most people do not freeze because they are uncaring. They freeze because they are unprepared. The skills that follow eliminate that hesitation by turning uncertainty into confidence.
Assess the Scene Before You Act
The first moments of any emergency are not about treatment, they are about assessment. Rushing in without evaluating the situation can turn one victim into two. A quick, deliberate scan of the scene followed by a responsiveness check and a call for help sets the foundation for everything that follows.
Check for Safety Hazards First
Before touching anyone, scan the environment for threats that could make you a second victim: traffic, fire, downed power lines, chemical spills, or structural instability. You cannot help anyone if you become part of the emergency yourself.
Check Responsiveness
Tap the person firmly on the shoulders and shout, “Are you OK?” Look at their chest for normal breathing for no more than ten seconds. Gasping or gurgling, called agonal breathing, is not normal breathing. It is a sign of cardiac arrest.
Call 911 Immediately
Put the phone on speaker so dispatchers can guide you in real time while you work. If bystanders are present, point directly at one person and say, “You, call 911.” Point at another and say, “You, go find an AED.” Tell the dispatcher your exact location, what happened, and how many people are affected.
Hands-Only CPR: The Skill That Saves the Most Lives
Of all the skills in this guide, CPR is the one most likely to determine whether someone lives or dies. When the heart stops, blood stops flowing to the brain.
Chest compressions manually pump blood through the body, buying time until an AED or paramedics can restore a normal rhythm. The technique is simple, requires no equipment, and can be performed by anyone — trained or untrained.
When to Start CPR
If the person is unresponsive and not breathing normally, or is only gasping, start chest compressions immediately. Do not waste time trying to find a pulse. If you are unsure, start CPR. The cost of unnecessary compressions on someone who does not need them is trivial compared to the cost of doing nothing for someone who does.
How to Perform Hands-Only CPR Step by Step
Place the person on a firm, flat surface. Kneel beside them. Position the heel of one hand on the center of their chest, right between the nipples, and interlock the other hand on top.
Push hard and push fast. Compress the chest at least two inches deep at a rate of 100 to 120 compressions per minute. If you need a rhythm to follow, match the beat of “Stayin’ Alive” by the Bee Gees. Allow the chest to fully recoil between each compression, do not lean on the chest. Minimize interruptions. Pauses longer than ten seconds significantly reduce effectiveness.
CPR With Rescue Breaths
If you are trained in CPR, use a 30:2 ratio — thirty compressions followed by two rescue breaths. Tilt the head back with a chin lift to open the airway, seal your mouth over theirs, and give each breath for about one second, just enough to see the chest rise. If you are not trained, hands-only CPR is still highly effective. Do not let the rescue breathing piece stop you from acting.
How Long Should You Continue CPR?
Continue until emergency medical services arrive and take over, the person regains consciousness and begins breathing normally, an AED is ready and provides instructions, or you are physically unable to continue. If other rescuers are available, switch every two minutes to maintain compression quality. Fatigue sets in faster than people expect.
How to Use an AED (Automated External Defibrillator)
CPR keeps blood flowing, but it does not restart the heart. That is what an AED does. When someone collapses in sudden cardiac arrest, the heart is often in a chaotic rhythm called ventricular fibrillation. An AED delivers a controlled electrical shock that can reset the heart and allow it to resume beating normally. Used within the first few minutes, an AED combined with CPR gives a person the best possible chance of survival.
What Is an AED and How Does It Work?
An AED is a portable device that analyzes a person’s heart rhythm and, if it detects a shockable rhythm, delivers an electrical shock to restore a normal heartbeat. The most important thing to know is that AEDs are designed for anyone to use — no medical background required. The device provides step-by-step voice prompts that guide you through the entire process. You cannot accidentally shock someone who does not need it; the device makes that decision for you.
Step-by-Step AED Instructions
Power on the AED and listen to the voice prompts. Expose the person’s chest completely — remove or cut clothing, dry the skin if it is wet, and remove any medication patches you see.
Apply the adhesive pads exactly as shown on the diagrams printed on the pads themselves: one pad on the upper right chest, one on the lower left side below the armpit.
When the AED says “analyzing,” make sure nobody is touching the person. If the device advises a shock, confirm that everyone is clear and press the shock button — or, on a fully automatic model, the device delivers the shock itself.
Resume CPR immediately after the shock. Continue alternating two minutes of CPR with AED analysis until EMS arrives.
Special AED Considerations
If the person has a pacemaker — visible as a small bump under the skin near the upper chest — place the pad at least one inch away from the device.
For children under eight, use pediatric pads or a pediatric key if available; if not, use adult pads. If the person is lying in water, drag them to a dry surface before applying pads.
If they are wearing a medication patch on the chest, remove it and wipe the area before pad placement. For more on navigating these real-world scenarios, see our guide to special considerations when using an AED.
Why AED Readiness Matters as Much as Ownership
An AED with expired pads or a dead battery is as useless as having no AED at all. Electrode pads contain adhesive gel that degrades over time.
Batteries lose their charge even when the device is never used. Research shows that approximately fifteen percent of publicly installed AEDs are not rescue-ready when inspected, and expired consumables are the leading cause of failure.
Organizations that invest in an AED must also invest in a maintenance and tracking program that catches expirations before they create a false sense of security.
This means routine inspection of pads, scheduled battery replacement, and documented self-test verification — a responsibility that should never fall through the cracks.
For guidance on keeping your devices consistently rescue-ready, read our detailed guide on AED maintenance and readiness.
Choking: How to Perform the Heimlich Maneuver
Choking happens fast and often without warning — during a meal, while snacking at a desk, or when a small child puts something in their mouth. When a foreign object completely blocks the airway, the person cannot breathe, speak, or cough it out on their own.
Without intervention, unconsciousness can occur in under a minute. The Heimlich maneuver — also called abdominal thrusts — is the standard technique for clearing the obstruction and restoring airflow.
Recognize the Signs of Choking
The universal choking sign is hands clutching the throat. The person cannot speak, cough, or breathe. Their skin may begin turning blue or grey.
Distinguish between mild obstruction — the person can still cough forcefully and should be encouraged to keep coughing — and severe obstruction, where there is no airflow and immediate action is required.
Heimlich Maneuver for Adults and Children Over One Year
Stand behind the person and wrap your arms around their waist. Make a fist with one hand and place it just above the navel, well below the ribcage. Grasp the fist with your other hand and deliver quick, inward-and-upward thrusts.
Repeat until the object is expelled or the person loses consciousness. If they become unconscious, lower them to the ground and begin CPR, checking the airway for visible obstructions before giving rescue breaths.
What to Do If You Are Choking Alone
Place your fist above your navel and thrust inward and upward. For extra leverage, lean your abdomen over the back of a sturdy chair or the edge of a countertop and drive your body weight into it. Continue until the object is dislodged.
Choking in Infants Under One Year
Do not use abdominal thrusts on an infant. Instead, place the baby face down along your forearm, supporting the head, and deliver five firm back blows between the shoulder blades with the heel of your hand.
Then turn the baby face up on your forearm and give five chest thrusts using two fingers on the lower breastbone. Alternate between back blows and chest thrusts until the object clears or the infant becomes unresponsive — at which point, begin infant CPR immediately.
Stop the Bleed — Controlling Severe Bleeding
Traumatic injuries from accidents, falls, or workplace incidents can cause rapid, life-threatening blood loss. In many cases, the person nearest to the victim, not the paramedic who arrives eight minutes later, is the one who has the best chance to stop the bleeding and prevent death.
The techniques below are straightforward, require minimal supplies, and work in the critical window before professional help takes over.
Why Bleeding Control Is a Critical Skill
Uncontrolled bleeding from a traumatic injury can kill within minutes — faster than almost any other emergency outside of cardiac arrest. The national Stop the Bleed campaign was developed to train civilians in bleeding control precisely because EMS often cannot arrive fast enough to intervene.
Apply Direct Pressure
Press firmly on the wound with your hands, a clean cloth, or gauze. Do not lift the cloth to check if the bleeding has stopped — if blood soaks through, add more material on top and increase pressure. If possible, elevate the injured area above the level of the heart.
Pack Deep Wounds
For wounds in areas where a tourniquet cannot be applied — the groin, armpit, or neck — pack gauze or clean fabric tightly and directly into the wound cavity. Maintain constant, firm pressure.
When and How to Use a Tourniquet
For severe limb bleeding that direct pressure cannot control, apply a tourniquet two to three inches above the wound. Never place a tourniquet on a joint.
Tighten it until the bleeding stops — this will be painful, but it is necessary. Note the time of application and communicate it to EMS when they arrive.
A commercially manufactured tourniquet is always preferred, but in a crisis, an improvised tourniquet using a belt or strip of fabric with a rigid windlass can work.
Recognizing and Responding to a Stroke (FAST)
A stroke occurs when blood flow to part of the brain is cut off, either by a clot or a ruptured blood vessel. Brain cells begin dying within minutes, and every moment without treatment increases the risk of permanent disability or death. Unlike cardiac arrest, a stroke does not always look dramatic — the person may seem confused, complain of a sudden headache, or simply start speaking strangely. Knowing how to recognize the signs quickly is what makes the difference.
The FAST Method
Stroke recognition saves brain cells. The FAST acronym is the fastest way to identify a stroke in progress:
F — Face: Ask the person to smile. Does one side of the face droop?
A — Arms: Ask them to raise both arms. Does one arm drift downward?
S — Speech: Ask them to repeat a simple sentence. Is their speech slurred or difficult to understand?
T — Time: If any of these signs are present, call 911 immediately. Note the time symptoms started — treatment windows depend on it.
What Not to Do During a Stroke
Do not give the person food, water, or medication. Do not let them “sleep it off” or assume symptoms will pass on their own. Do not drive them to the hospital yourself unless EMS is unavailable — paramedics can begin treatment en route and notify the hospital to prepare.
Why Time Is Brain
Stroke treatments, including clot-dissolving medications, are most effective within three to four and a half hours of symptom onset. Every minute without treatment, an estimated 1.9 million neurons are destroyed. Getting the person to a hospital quickly is not a precaution — it is the treatment.
Burns | Immediate Response by Severity
Burns are among the most common injuries people encounter at home and in the workplace, and the immediate response determines how well the tissue heals.
The severity of a burn dictates the treatment — and getting it wrong, such as applying ice or butter, can make the damage significantly worse. Here is how to respond correctly based on the degree of the burn.
First-Degree Burns
Redness and pain without blisters. Cool under running water for at least ten minutes — never use ice. Cover loosely with a clean, non-stick dressing.
Second-Degree Burns
Blistering, intense pain, and swelling. Cool with running water for at least ten minutes. Do not pop blisters — they protect against infection. Cover with a sterile, non-stick dressing and seek medical attention.
Third-Degree Burns and Beyond
Charred, white, or leathery skin that may be painless due to destroyed nerve endings. Call 911 immediately. Do not run water over large third-degree burns.
Cover loosely with a clean, dry cloth and monitor for shock — pale skin, rapid breathing, confusion. Keep the person warm and lying down with legs elevated if possible.
What Not to Do With Burns
No ice, no butter, no toothpaste, no adhesive bandages directly on open burns. These home remedies trap heat, increase tissue damage, and introduce infection.
Allergic Reactions and Anaphylaxis
Most allergic reactions are mild — a rash, some itching, a bit of swelling. Anaphylaxis is not mild. It is a severe, whole-body allergic reaction that can close the airway, crash blood pressure, and kill within minutes if untreated.
It can be triggered by foods, insect stings, medications, or latex, and it can happen to someone who has never had a serious allergic reaction before.
Knowing how to recognize anaphylaxis and use an epinephrine auto-injector can be the difference between a close call and a fatality.
Recognize Anaphylaxis
Anaphylaxis can develop within seconds of exposure to a trigger — food, insect stings, medications, or latex. Signs include swelling of the face, lips, or throat, difficulty breathing or wheezing, widespread hives, rapid pulse, dizziness, nausea, and a feeling of impending doom.
Using an Epinephrine Auto-Injector
If the person has a prescribed auto-injector, retrieve it immediately. Remove the safety cap, press the tip firmly against the outer thigh, through clothing is fine, and hold for ten seconds. Call 911 immediately, even after administering epinephrine; the medication is temporary and symptoms can return.
Post-Injection Care
Keep the person lying down with legs elevated unless they are having difficulty breathing, in which case let them sit upright. A second reaction, called biphasic anaphylaxis, can occur thirty minutes to several hours later. Stay with the person until EMS arrives.
Overdose Response and Naloxone
The opioid crisis has turned drug overdose into one of the leading causes of preventable death in the United States. An opioid overdose suppresses breathing to the point where the brain is starved of oxygen — and without intervention, death can follow within minutes.
Naloxone, commonly known by the brand name Narcan, is a medication that rapidly reverses the effects of an opioid overdose and is now available without a prescription in most states. Understanding how to recognize an overdose and administer naloxone is a modern life-saving skill that belongs alongside CPR and first aid.
Recognizing an Opioid Overdose
Pinpoint pupils, slow or stopped breathing, blue or grey lips and fingertips, gurgling or snoring sounds, and unresponsiveness. The opioid crisis has made overdose a public health emergency — knowing how to respond is now as essential as knowing CPR.
How to Administer Naloxone (Narcan)
Naloxone nasal spray is available without a prescription in most states. Tilt the person’s head back, insert the nozzle into one nostril, and press the plunger firmly. Call 911 — naloxone wears off faster than most opioids, so the person may stop breathing again after the medication fades.
The Recovery Position
If the person begins breathing on their own after naloxone, place them on their side — one arm extended under the head, the top leg bent forward for stability. This prevents choking on vomit if they become nauseous. Keep them warm, stay with them, and do not leave until EMS arrives.
Water Safety and Drowning Response
Drowning is one of the fastest and most silent emergencies a person can face. Unlike what movies portray, a drowning victim rarely splashes or screams — they slip under the surface quietly, often within arm’s reach of other people.
It is the leading cause of unintentional death for young children and a significant risk for adults in pools, lakes, and open water. The best defense is prevention, but when prevention fails, knowing how to respond without putting yourself in danger can save a life.
Prevention First
Drowning is the leading cause of death for children ages one to four and remains a top cause for children under fourteen. Most drownings happen quickly and silently — not with the dramatic splashing people expect.
Never swim alone. Supervise children constantly around any body of water, including bathtubs and wading pools.
Follow the “Reach, Throw, Don’t Go” rule: extend a pole or towel, throw a flotation device, but never jump in to rescue someone unless you are trained in water rescue — a panicking victim can pull an untrained rescuer underwater.
Responding to a Drowning Victim
Remove the person from the water safely. If they are not breathing, begin CPR immediately — for drowning victims, rescue breaths are especially important because the primary problem is oxygen deprivation.
Give two rescue breaths before starting compressions if you are trained. If the person is breathing, place them in the recovery position and monitor until EMS arrives.
Key Water-Safety Skills for Kids
Teach children basic swimming and floating by age four. Teach them to never enter the water to rescue someone — instead, shout for help and throw a flotation object. Ensure children understand the basics of calling 911, even from a young age.
Life-Saving Skills for Children and Infants
Children and infants are not simply small adults. Their anatomy, airway size, and the most common causes of cardiac arrest are different, which means the techniques used to help them must be adjusted accordingly.
Respiratory failure,not a heart rhythm problem, is the leading cause of cardiac arrest in children, making rescue breathing more important in pediatric emergencies than in adult ones. The following modifications apply to the CPR and choking skills covered earlier in this guide.
Infant CPR (Under One Year)
Use two fingers — not a full hand — placed on the center of the chest, just below the nipple line. Compress at least one-third the depth of the chest, roughly one and a half inches. Deliver thirty compressions followed by two gentle rescue breaths — just enough to see the chest rise. Be careful not to over-extend the neck when opening the airway; a neutral head position is best for infants.
Child CPR (Ages One to Eight)
Use one or two hands depending on the child’s size. Compress at least one-third the chest depth, roughly two inches. Follow the same 30:2 ratio. If two rescuers are present, switch to 15:2 for more efficient oxygenation.
Choking in Children
For children over one year, use a modified Heimlich maneuver — kneel or crouch behind the child to match their height and deliver inward-and-upward abdominal thrusts just as you would for an adult, adjusting force to their size.
Teaching Kids to Be First Responders
Children as young as five can learn to call 911 and clearly describe an emergency — their location, what happened, and whether the person is breathing.
Age-appropriate training builds confidence and reduces panic. It also means there is always someone in the household who knows how to get help, even when the adults are the ones in trouble.
Overcoming the Fear of Helping — Good Samaritan Laws
One of the most common reasons people do not step in during an emergency is not a lack of knowledge — it is a fear of consequences. “What if I do it wrong?” “What if I make it worse?” “What if I get sued?” These fears are understandable, but they are largely unfounded.
Legal protections exist specifically to ensure that bystanders who try to help in good faith are shielded from liability. Understanding these protections can remove the last barrier between hesitation and action.
What Are Good Samaritan Laws?
Every state in the U.S. has some form of Good Samaritan law that protects people who provide emergency care in good faith from being held legally liable. These laws exist specifically to encourage bystanders to act without fear of a lawsuit.
What the Law Protects
You are protected when you voluntarily help someone in an emergency without expecting compensation, when you act within the scope of your training or provide basic care like calling 911 and performing CPR, and when you act reasonably and without recklessness. You are not expected to be perfect — you are expected to try.
The Bigger Risk Is Not Acting
Fear of doing something wrong is the number one reason bystanders hesitate. But imperfect CPR is far better than no CPR. Cracked ribs heal. Brain death does not. If you are unsure of technique, call 911 and put the phone on speaker — dispatchers are trained to walk untrained bystanders through CPR in real time. You do not have to be fearless. You just have to be willing.
Emergency Readiness | Preparedness Is a Life-Saving Skill Too
Everything in this guide so far has focused on what an individual can do in the moment of an emergency. But there is another layer of life-saving that happens long before anyone collapses or starts choking — the organizational decisions that determine whether the right equipment is in the right place, whether it actually works, and whether the people nearby know how to use it. Preparedness is not a single purchase. It is an ongoing commitment.
What Makes an Organization Truly Ready?
Having an AED on the wall is step one — but an AED alone does not make an organization ready. True emergency readiness is the combination of equipment, service, and training working together. AEDs, first aid kits, and emergency oxygen need to be accessible, properly maintained, and paired with people who have been trained to use them.
The Role of Emergency Oxygen
Supplemental oxygen is one of the most overlooked components of emergency readiness. In cardiac events, respiratory emergencies, and post-rescue care, increasing oxygen concentration helps prevent damage to vital organs. Emergency oxygen inhalators are available without a prescription and can be used by trained staff in the critical minutes before EMS arrives — yet most organizations do not even know they should have one.
Why Ongoing Service and Training Matter
AED pads and batteries expire. First aid supplies get used and not replaced. Skills fade without practice. A lapsed program creates the worst possible outcome: a false sense of security — people believing they are protected when the equipment they are counting on will not work.
That is why readiness requires ongoing, on-site service — not a one-time purchase and a hope for the best. Equipment must be inspected, expirations must be tracked, and training must be refreshed in a way that matches your environment and your equipment.
How Life Support Systems Keeps Organizations Rescue-Ready
Since 1977, Life Support Systems has provided end-to-end emergency readiness programs — equipment, on-site service, and certified training — under one partner, nationwide.
Our full-time technicians come to your location to inspect, maintain, and track every AED, first aid cabinet, and oxygen unit — so nothing expires unnoticed and no device falls out of readiness. Our instructors, certified by the American Heart Association, the American Red Cross, and OSHA, train thousands on-site every year with courses customized to each client’s environment and equipment.
We never outsource. Every technician and every instructor is a full-time member of our team. That means continuity, accountability, and the kind of partnership organizations can rely on when a life is on the line.
If your organization has equipment but no structured readiness program — or if you are not sure whether your current AEDs are rescue-ready — speak to a specialist to find out which program is right for you.
Frequently Asked Questions
What Are the Five Most Important Life-Saving Skills?
The five most critical skills for any bystander are calling 911 quickly, performing hands-only CPR, using an AED, controlling severe bleeding, and clearing a choking airway with the Heimlich maneuver. Together, these cover the emergencies most likely to cause death before professional help arrives.
What Is the First Thing You Should Do to Save a Life in an Emergency?
Assess the scene for safety, then check the person’s responsiveness. If they are unresponsive and not breathing normally, call 911 immediately — or assign someone to call — and begin CPR or the appropriate intervention. Getting EMS on the way while you act is the single most effective first step.
Can You Get Sued for Performing CPR on Someone?
Good Samaritan laws in every U.S. state protect people who provide emergency care in good faith. As long as you act reasonably and without reckless behavior, you are legally protected. The far greater legal and moral risk is choosing not to act at all.
How Do You Perform CPR If You Are Not Certified?
Use hands-only CPR. Call 911 and put the phone on speaker. Place your hands on the center of the person’s chest and push hard and fast at a rate of 100 to 120 compressions per minute. No rescue breaths are needed. The 911 dispatcher can guide you through each step in real time.
What Is the Difference Between CPR and BLS?
CPR refers specifically to chest compressions and rescue breathing. BLS, or basic life support, is a broader set of emergency protocols that includes CPR plus AED use, airway management, choking relief, and team-based response coordination. BLS certification is typically required for healthcare providers, while CPR training is appropriate for anyone.
How Do You Use an AED With No Training?
Turn it on and follow the voice prompts. The device tells you exactly where to place the pads, automatically analyzes the person’s heart rhythm, and instructs you whether a shock is needed. You cannot accidentally shock someone who does not need it — the AED makes that determination. These devices are specifically designed for use by people with no medical background.
What Are the Signs of Sudden Cardiac Arrest?
The person suddenly collapses, is completely unresponsive, is not breathing or is only gasping, and has no detectable pulse. Unlike a heart attack — where the person is typically conscious and experiencing chest pain — cardiac arrest causes immediate loss of consciousness because the heart has stopped pumping blood to the brain.
How Long Should You Do CPR Before Stopping?
Continue CPR until EMS arrives and takes over, the person shows clear signs of recovery such as movement or normal breathing, an AED is ready and advises a different action, or you are too physically exhausted to maintain effective compressions. If another rescuer is available, rotate compressor duties every two minutes to maintain quality.
The Bottom Line
You do not need a medical degree, a certification card in your wallet, or years of training to save a life. You need the willingness to act and the basic knowledge to act correctly.
Every skill in this guide — from chest compressions to bleeding control to recognizing a stroke — can be practiced, retained, and deployed by any person in any setting.
The time to prepare is now, before the emergency happens. Whether that means taking a CPR and AED course, making sure your workplace has a maintained AED, or simply reading this guide and committing the steps to memory, you are choosing to be the person who acts instead of the person who watches.
Someone’s life may depend on exactly that choice.
Last updated on 3 days ago